What to do if the Canon camera got wet and won’t turn on? Well, this is the most unfortunate incident that can happen with a camera owner.
Water damage to digital cameras may appear to be a significant issue, but it is fully simple to restore the damage. You don’t need to be an expert in digital camera repair to fix the problem; all it takes is a few basic steps. To complete this project, work in a dry, well-ventilated area and follow the procedures below.
How to fix water damaged Canon camera?
Follow these simple steps to revive your water-damaged camera:
- Remove the camera from the water as soon as possible or move it to a dry spot.
- Use a dry cloth to wipe any water off the exterior of the camera.
- Remove the battery from the device.
- The battery compartment should be left open.
- Remove the recording media from the machine.
- Leave the container for media open (if applicable).
- Allow at least 24-48 hours for any inside moisture to dissipate by placing the camera in a warm, dry environment.
WARNING: There’s a chance you’ll break something. At this moment, do not attempt to turn on the camera. If any quantity of water has leaked into the camera circuits, turning on the camera at this time could cause serious damage to the camera due to the voltage produced by the batteries.
Later on, you can try turning on your camera by a reset or restoring your camera.
Helpful: How to reset or restore Canon camera?
This technique is equally applicable for Canon EOS, Rebel, R, mirrorless, PowerShot cameras, and also for Nikon or Sony Cameras.
How to dry your water-damaged camera?
You should adopt the following precautionary measures if your camera gets in touch with water:
- Use Silica Gel to Isolate Your Camera
- Use a rice bag to remove moisture
- Expose direct sunlight to the camera
- Use your Hairdryer
Canon camera got wet and won’t turn on can be optimized by making it dry.
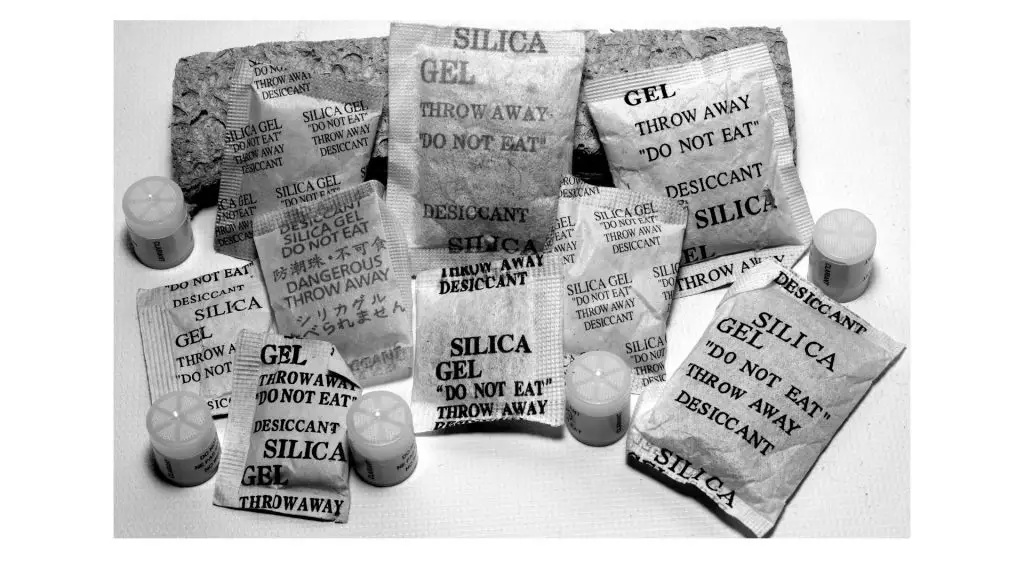
How to use Silica Gel for drying wet cameras?
If you’ve ever purchased new shoes, a pocketbook, or a wallet, you’ve definitely noticed the little white packets that say “Silica Gel,” and they usually add state that these packets are not for eating.
The purpose of these packets is to absorb any moisture that may enter the object, which is especially important when things are waiting to be sold at retail stores or warehouses. Some people even carry these packets in their purses and wallets to keep them safe from water damage.
Check your local arts and crafts store if you don’t have some on hand. They frequently sell silica gel, as do certain department stores. You’ll be able to get a large quantity for a little price, and it’s the most effective method for extracting water from an object, so try it before reaching for the rice or throwing your camera in the sun.
Put your camera or lens in an airtight jar with a tonne of silica gel and keep it somewhere warm. Leave it for a few days, making sure it’s not in direct heat or near a vent. Because the silica gel can take up to a week to function, give it that time before examining the lens and camera.
If you’re going to use this method to dry up the complete camera, make sure the battery and memory card isn’t included in the process. Because of the power stored in the battery, you can truly ruin everything, so keep them tucked away while you wait for your camera lens to dry.
You can use this technique to extract water from any wet electronic device. It’s a really safe and simple procedure! It will work for your phone as well as any external hard drives that may have been with you and gotten wet.
Read Also: How to restore Canon camera lens error?
How to use Rice Bag for wet cameras to dry?
You’ve probably heard of this typical drying procedure if you’ve ever dropped your phone in water. In a similar way to the silica gel approach, a bag of rice may be used to pull out water.
To be clear, this method uses uncooked rice to absorb moisture off your camera. You may effectively draw the moisture out of practically any device with the use of an airtight bag before it deteriorates.
This is accomplished by placing uncooked white rice in an airtight container. You may use whichever type of rice you like, but be aware that you may need to do some external cleaning or deal with spicy odors when the procedure is through. After that, place your camera lens in the container, seal it, and lay it aside for a few days.
It’ll be similar to the silica gel in that you’ll have to wait a few days before checking it and seeing if it helped. You may also use this method to dry out the complete camera, so don’t be afraid to keep it in a bag for a while.

The faster you can insert the camera into the rice, the better. If you’re far from home or shooting photos somewhere where you don’t have access to your pantry, it’s well worth stopping at the next grocery shop to pick up a bag of rice and some freezer bags. Depending on how pricey your camera lens is, this might save you hundreds, if not thousands, of dollars.
When compared to utilizing silica gel, this approach is far more accessible, and some people trust it since it has previously worked for them. Just keep in mind that the silica gel approach is the first thing you should attempt, but this will work almost as well.
This is also an excellent procedure for anything else that may have fallen into the water unexpectedly. Rice is inexpensive, so it’s a wonderful way to use up any half-opened packages in your cupboard.
This is the most instant method that you can adopt if your Canon camera got wet and won’t turn on.
How direct sunlight can be helpful in reviving a wet digital camera?
This should be your final effort, and you should only use it if the first two tries failed. To put it another way, you may try leaving your camera out in direct sunshine for hours on end to see whether it will dry.
This is a last-ditch effort because it has the potential to completely damage some cameras. However, if your camera already has moisture in it, it’s pretty much useless, so it’s worth a go since it might occasionally work.
Simply keep your camera outside in direct sunlight on a bright, sunny day. Leave it out for a few hours and check on it to see how the process is progressing. It’s not like the other two techniques where you have to keep it in an airtight container, so you can check on it and see how it’s going.
Make sure you’re doing this in a secure, well-controlled setting. You don’t want it to be too hot outside, and you certainly don’t want it to be an overcast day with the possibility of rain. If you use this strategy, be sure to keep an eye on the weather.
Also Read: How to reset canon camera wifi password?
It can’t be on covered porches or anything like that since it has to be in direct sunshine. The shadows will alter throughout the day, even if you keep them in a direct sun location. You’ll need to leave your camera out for at least 5 hours anyhow, so it’s unlikely that it will be covered by the end of the day.
When it comes tonight, make sure you don’t leave your camera unattended. If you’ve ever stepped on the grass first thing in the morning, you’ll understand why. Dew will cover everything in even the tiniest amount of water, reversing all the effort you’ve made in attempting to dry off your camera.
Just keep in mind that you should only use this strategy if nothing else works. You shouldn’t do this with any other equipment, particularly those with a battery you can’t get to, such as your phone. You can extend the battery in the heat, which might cause more pain than it’s worth, especially because this approach seldom works.
Can hairdryer be used to repair a wet digital camera?
A hairdryer can be the best option if the camera hasn’t been exposed to too much water. The interior of the camera will be gently dried. Do not use the hairdryer’s highest setting. If you do, the water may be forced into other parts of the camera. This will result in further harm, which may be irreparable.
Water Types Affect What Happens
If moisture gets into your camera lens, you now know how to dry it. That isn’t to say that’s the only thing you need to accomplish. Canon camera got wet and won’t turn on is the issue that depends on the type of water.
You may have to deal with a few more issues than dampness depending on where you drop your camera. Consider this: if you live near the sea, you must deal with saltwater.
Other substances, such as salt and iron, do not evaporate while the moisture does. They stay in your lens and depending on where you drop your camera in the water, you’ll need to know a few things.
Water from the sea
I completely understand; beach photos are stunning. However, if your camera falls into ocean water, you may have a significant problem with your hands.
You’ll have to find out how to remove any salt out of your lens in addition to getting the moisture out (which isn’t an easy task). This is a far more complicated topic that you cannot overlook.
Salt is found in the leftovers of ocean water, and it will quickly corrode the inside elements of your camera lens.
To get this type of content out, you’ll need to hire a specialist. You may seek a nearby repair shop, but such are few and far between. The best solution is to have your camera lens repaired or replaced by the manufacturer.
Read Also: Can I use Nikon Lenses on Canon camera?
It will most likely be expensive, but it is the best option to save your camera lens. It’s also the only method to ensure that your camera has been repaired, cleaned, and won’t have any future issues as a result of any mistakes you made.
Lake Water
You don’t want to get your camera lens infected by germs and algae that are lurking in lake water.
Water seldom penetrates your lens deeply enough to cause harm. A camera that is immersed for a lengthy period of time is more likely to be affected by water damage.
Even if you’re able to get the lens out of a particularly sludged lake, you may still need to clean it. Fortunately, repairing a camera lens that has been submerged in ocean water is a lot easier than this.
The lens is already damp, so run it under the faucet to dry it out. Once you’ve cleaned your lens to the best of your ability, dry it using one of the methods described above. The fact that you’re already near a sink makes this an ideal moment to utilize rice.
Your camera lens won’t be harmed further than it already has been by this procedure. At this point, the camera lens has already been damaged, so don’t be concerned about getting it “too wet.”
Tap Water and Rain Water
If your camera lens is saturated by an unexpected rainfall or if you accidentally put it into some form of tap water, it should be OK. If you smell or see any particles on it, treat it the same way you would lake water after it has been fully dried.
If you reside in an area with high levels of air pollution, you may wish to wash your camera before using it. Rainwater in regions with poor air quality might reflect pollutants that don’t show up as particles on your lens but can nevertheless cause chemical harm.
Additionally, if you know that the tap water in your area is tainted with iron, you should also clean your camera lens. For those who are concerned about the quality of their tap water, buying bottled water is an excellent option. To ensure thorough cleaning, use at least two and preferably three gallons of water.
Read Also: How to safely format your SD card?
Even if the Camera works, Be Careful
Following a thorough drying of the device, it should start operating properly again. Corrosion from moisture may induce a short circuit and lead the gadget to fail within a few weeks. In the camera, bacteria from ponds, rivers, and tap water can accumulate on the cloth shutters, resulting in mold growth and eventual camera failure. Lenses that have been exposed to moisture over time may get cloudy and finally cease to function.
How to successfully dry your wet GoPro camera?
Here are some pointers to help you start drying your GoPro.
Please keep in mind that each of the suggestions should be used with caution because they have the potential to permanently harm your camera. Please don’t go any further if you aren’t sure about the consequences of your actions. Naturally, I’m not liable for any unsuccessful repairs or damages you suffer. These recommendations are presented as suggestions for you to think about, and they may or may not work on your model.
Remove the lens, battery, and SD card:
Remove battery, lens, and SD card to enable air to pass through the cavities in the camera.
Using fresh water, rinse:
Caution is advised! While it may seem counterintuitive at first, it is possible that you will need to rinse the camera before beginning the drying process. If the camera was submerged in salt, chlorine, or dirty water, you’ll want to remove the residue before removing the water. Otherwise, it may cling to the components and corrode them.
Remove the water by shaking the camera:
You may swing it to move the water out of the camera using centripetal force. You might also use compressed air or a vacuum cleaner to remove any remaining droplets. If you hold the vacuum too close to your camera, it can produce static electricity, which will harm it.
Read Also: How to connect canon camera to mac?
Place it in the rice:
This is a well-known method for rescuing wet electronics, although I’m not sure how effective it is. Online, the results appear to be mixed. After doing everything else I can to eliminate the moisture, I believe this will be my final step. And don’t do it without first rinsing off any residue (salt, dirt, or chlorine) with fresh water. You may also use silica gel, which comes in small sachets in modern electronics packaging. According to conventional thinking, thoroughly drying rice or silica gel can take up to a week. The outcome may differ.
Open the camera:
When you open the camera, proceed with caution! This is done by some users to let the camera to dry and remove any salt, rust, or other residues. Please keep in mind that opening the casing will void your warranty. Plus, if you’re anything like me, putting all the parts back where they belong might be difficult. After putting everything back together, I always have a few extra parts. This is not a good idea.
Keeping it near a dehumidifier:
It is a good idea: I dropped a full water bottle on my laptop keyboard a few days ago. I positioned the housing in front of a dehumidifier exhaust in our basement after dumping the water out of it. It has been showered in a steady flow of dry, warm air for the previous 36 hours. I’m going to attempt to switch it on later today, and I’m hopeful.
Read Also: How to charge Canon camera without charger?
How long should you leave your camera in rice?
Give a proper time of 24-48 hours to your camera for drying by placing it in the rice. In this way, it can bring you effective results.
What happens if camera lens gets wet?
There is no risk to the electronics because there is no source of electricity in the lens, but the longer water lingers within your lens, the more harm it can do to other components of your lens.
How do you dry out a DSLR camera?
You can use any technique out of many. You can use rice, silica gel, a hairdryer, and direct sunlight to dry your DSLR camera. All these methods are easy to follow and most efficient.
Can a film camera get wet?
Water won’t harm the film chemically, but it may cause the emulsion to swell, causing everything to clump together when it dries. The best chance is to bring the (wet) film to a professional lab as soon as possible and have it processed.
What happens if a disposable camera gets wet?
A film that has been soaked in water (particularly salt water) will usually affect processing. It won’t break the machine, but it will affect the film and all subsequent films until the chemistry is fully flushed.
What do you do when your camera won’t turn on?
Make sure the camera’s battery is correctly inserted. Make an attempt to turn the camera on. If you have the optional AC power adapter, connect it to the camera and a functional electrical outlet if the problem persists. Make an attempt to turn the camera on.
Read Also: How to attach a camera strap?
Conclusion
If your Canon camera got wet and won’t turn on, you can easily handle this situation. Remove the battery, memory card, and lens. Adopt any method to make it dry. Either use silica gel or use rice as well as your hairdryer to make it dry. Give it a proper time to dry and try to power it on now.
FAQs
Is there a reset button on Canon camera?
By removing the CF card, turning the camera off, and then holding down both the shutter and menu buttons while turning the camera on again, Canon cameras may be reset to their factory default settings. 3) While turning on the camera again, hold down both the Shutter and a Menu button.
What happens wet film?
What happens if you get your film wet? The base of a film that has been submerged in water is at grave risk of separating from the emulsion. This implies that the image-containing portion of the film will separate from the plastic backing that gives the film its form.
How do you get moisture out of a camera lens?
The use of silica gel is one of the most frequent and successful methods for removing moisture from camera lenses. Silica gel aids in the removal of moisture from electronics, including camera lenses. It may be found at department stores, art and craft stores, and other similar establishments.
Why won’t my Canon EOS turn on?
The most common cause of your camera not turning on is a dead battery or one that is not correctly installed. The first step is to charge your battery, then double-check that it is properly fitted into the compartment.
Why is my Canon not taking pictures?
Resetting all of the settings on your DSLR might sometimes help you fix the problem of your DSLR not capturing images. SOLUTION: All you have to do to get to the Reset button is go to the shooting menu and then to the Setup Menu. After then, try clicking the picture again to see if anything has changed.
Can a wet digital camera be repaired?
You must act fast if your digital camera becomes wet or is dumped in the water. Even a small bit of water can cause the camera to be permanently ruined. Use a rice bag or silica gel, and place the camera in direct sunlight as precautionary measures.
Does Canon warranty cover water damage?
Forget about it; Canon won’t fix water damage since they can’t guarantee the work, and something else always comes up to pose a problem. Warranty only covers the functional errors and faults.
Featured Image: Harry via unsplash.com
