Transferring the data from a device to a system is a part of professional life. “ How to connect canon camera to mac “ is the question that refers to the connection, share, download, transfer, and usage as a webcam. Canon EOS R and Canon PowerShot cameras can also be
This article mentions the exact details about the connection of the camera to the MacBook pro, sharing or transferring, or downloading data from the Canon camera to the mac, and also the usage of the canon camera as a webcam.
Also Read: How to reset canon camera wifi password?
Answer
There are 3 methods to connect your Canon camera to a MacBook:
- Using a USB drive
- Connecting with SD card
- Connecting wirelessly
1. Connect your Canon camera to your MacBook with a USB drive
A USB cable is one of the easiest methods to connect your Canon camera to your computer.
This is typically the quickest and most dependable method to transfer your digital images from your USB drive to your computer.
How do I connect a Canon camera to MacBook using a USB drive?
These are 4 easy steps to connect a Canon camera to Macbook using a USB drive:
- Connect the appropriate end of the USB cable to the USB slot on your Canon camera.
- Connect the appropriate end of the USB cable to the USB port on the side of your laptop or on your computer tower.
- Turn on your digital Canon camera and wait for the instructions to appear on your computer screen.
- To upload the photos into your appropriate photographic viewing program, follow the instructions on your screen. Depending on whether you have a Mac OS or a Windows PC, this program may change.
2. Connect your Canon camera to your MacBook with an SD card
An SD card is another wonderful option to attach your digital Canon camera to your computer.
Photographers who capture hundreds of digital images with each session and wish to preserve a backup of all of their data on an SD card will find this approach to be quite popular.
How do I connect a Canon camera to MacBook using an SD card?
You can connect your Canon camera to your MacBook with an SD by following these steps:
- Check to see whether your computer has a slot for inserting an SD card.
- Make sure your digital camera is turned off.
- You may either gently pull on your SD card or push the SD card release button to remove it.
- Wait for the SD file folder to show on your screen after inserting the SD card into your computer’s SD card port.
- Save the photos to your computer from the SD card.
You will need to purchase an SD card reader( shown in the picture below ) if your computer does not already have a card slot. You’ll be able to transfer all of your photographs and movies from your camera to your computer using this method.
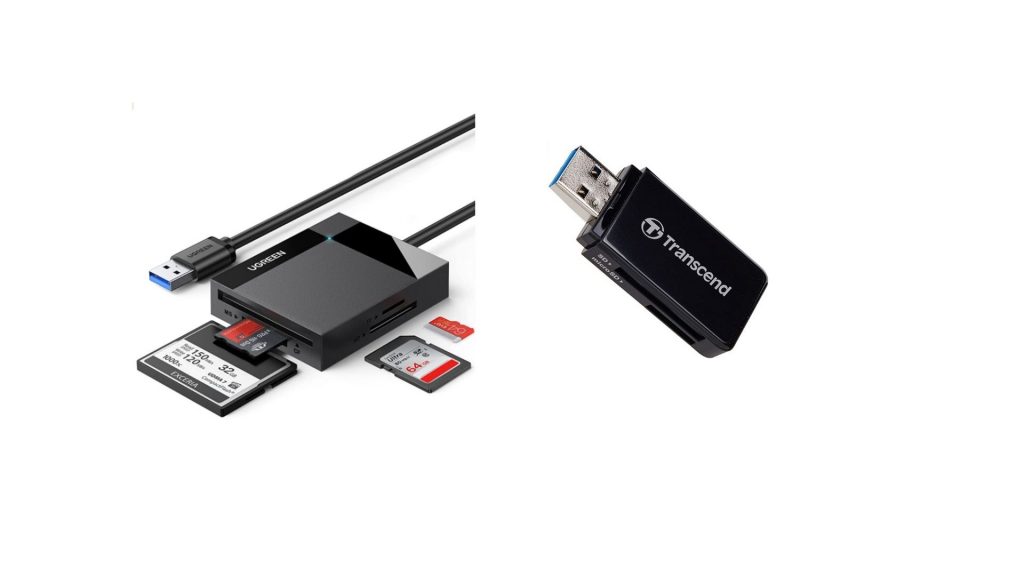
The adapter connects to your computer’s USB port. The SD card will hold anything you have on your camera.
Why don’t you try erasing your SD card? You may repeat the method above when your SD card is full (or you want it to be empty).
After you’ve uploaded and saved the files you wish to retain on your computer, just format your SD card safely so it’s clean when you insert it into your camera.
3. Connect a Canon camera to MacBook wirelessly
This method is the cheapest and most reliable as there is no need to buy a USB drive or card reader. But your canon camera must be wifi supporting.
Wirelessly connecting your digital Canon camera to your computer is the last and most recent option.
How do I connect my Canon camera to my MacBook wirelessly (wifi)?
Follow these steps to connect your Canon camera to MacBook with wifi:
- Determine if you’ll be using a MacBook or a PC to connect wirelessly.
- Connect your PC or laptop to a secure WiFi network to get access to the internet.
- Follow the instructions in your Canon camera’s wireless handbook to install the Canon driver program on your computer.
- Turn on your Canon and your Canon camera’s wireless communication.
- Wait for your computer to identify your camera’s WiFi signals and access the matching picture folder that appears on your screen.
- Move your photos to a safe location on your computer.
These methods are the easiest and are mostly used by industry experts.
Connecting MacBook to your canon camera
If you’re using a Mac OS computer, you’ll need to download the necessary apps and software to ensure that your Canon DSLR photos upload correctly. How to connect canon camera to mac is summed up here,
If you want to transfer your DSLR Canon camera to your Mac OS, check sure the software is suitable.
A USB cord will be the most efficient method to upload your photos. A DSLR needs software that communicates USB cable information to your Mac, allowing you to transfer high-quality photographs in real time.
You won’t need to do anything more after you’ve uploaded your Canon point-and-shoot camera to your Mac if you have picture-receiving software installed. Simply connect your USB cord and wait for your operating system to alert you.
Connecting your canon camera to windows OS
Because Windows on PC is continuously compatible with Canon camera operating systems, connecting your Canon to Windows is often simple.
Connecting to Windows with a DSLR or a point-and-shoot camera requires software like Microsoft Photos that is already installed on your hard disc.
Because DSLR images are often bigger in size than point-and-shoot cameras, it’s crucial to ensure sure your computer has adequate space when uploading them to Windows.
The last thing a photographer wants to happen while uploading is to run out of space.
If you choose to upload your Canon point-and-shoot photos to Windows, you will have fewer problems. Just make sure you can save them straight to avoid losing quality or having them become hazy and pixelated.
They may be reduced in size and visual quality by running them via programs beforehand.
Read Also: How to reset or restore canon camera default settings?
Connect Canon EOS R camera to mac
There are 2 ways to connect your Canon EOS R camera to your mac:
- Using a USB
- Using wifi
How to connect Canon EOS R to mac with USB?
Follow these steps to connect your Canon EOS R camera to your mac with USB:
- Switch on the camera and press < Menu > on the camera body.
- Disable the camera’s “ auto power-off “ feature. Additionally, tap the < SET > button.
- Turn off the camera and plug one end of the USB cord into one of the Canon EOS R’s accessible ports.
- To link the two devices, repeat the procedure on the Mac.
- Create a connection with the camera using the Canon EOS utility program.
How to connect Canon EOS R to mac using wifi?
These are the steps that can connect your canon EOS R to a mac with the help of wifi:
- From Canon’s official website, download and install the Canon EOS Utility program for Mac.
- Enable wifi on your EOS R ; WIFI settings>Enable>Wifi Function>Remote Control (EOS Utility)>Register a device for connection.
- Enable wifi on your mac. Go to the WIFI network choice and pick ‘SSID WIFI details from above.’
- Press < ok > when the message “ start pairing devices “ appears.
- Now you’ll see a prompt ‘EOS XXXX pairing connection with the computer in progress.’
- To begin the pairing procedure, the EOS software would request a camera. ‘Connect’ and ‘Canon EOS R’s are the options. On the MAC screen, you’ll see a popup box that says, ‘Check the camera LCD and finalize the network settings.’
- The camera LCD would display ‘XXXXX discovered’ while you’re getting this question on the Mac screen. Connect to the computer. Simply choose OK.
Transfer pictures and videos from Canon PowerShot to Mac
There are three ways to download data from canon PowerShot to the mac:
- Using a card reader
- Using iphoto
- Using included software
How to transfer data from Canon PowerShot to Mac using a card reader?
- Take your Canon PowerShot memory card out of the camera and place it in a card reader.
- After connecting the card reader to your Mac, a card reader icon will show on the Mac desktop. To see the whole contents of the card, just double-click on the reader symbol.
- Double-click on the folder titled “DCIM” to view the photographs presented in an organized manner.
- Select the photographs you want to copy to your Mac and drag them right to the desktop.
How to transfer data from Canon PowerShot to Mac with Iphoto?
- Turn off your Canon PowerShot and connect it to your Mac.
- Open iPhoto on your Mac.
- Turn on your Canon camera, and a dialogue box will open on your computer, allowing you to download your photographs and movies from Canon PowerShot to Mac.
How to transfer data from Canon PowerShot to Mac using included software?
- To get started, locate the software package contained on the PowerShot camera’s CD-ROM and install it on your Mac.
- Connect the PowerShot to the Mac using the USB connection. On the Mac, the Camera Control Window will appear. If not, go to the Dock and click the Camera Window icon.
- Did you see the “Download Videos Now” button? Simply press it to save movies from your Canon PowerShot to your Mac. Alternatively, you may preview the videos by selecting “Lets You Select and Download Videos” from the drop-down menu.
How to use your Canon camera as a webcam?
Canon has announced that several of its DSLRs and mirrorless cameras may be used as an improved webcam on Macs. Here’s how to enhance your video conferencing picture using high-quality imaging gear.
How to download the Canon EOS webcam utility Beta?
These are easy steps to download the Canon EOS webcam utility Beta:
- Visit the utility’s dedicated help page on Canon’s website.
- Scroll down and choose the camera model you possess.
- Select the Drivers & Downloads option from the drop-down menu.
- Then choose Software.
- Choose the version of macOS that will be installed on the Mac.
- Select EOS Webcam Utility Beta from the drop-down menu.
- Click on the Download button.
How to install Canon EOS webcam utility Beta?
Once downloaded the Canon EOS webcam utility Beta, you can follow these steps to install it:
- Extract the package by double-clicking the zip file.
- Start the installation by double-clicking on the extracted package file.
- Click Next on the installer’s introduction page.
- Read the language on the Software License Agreement page before clicking Continue and agreeing to the pop-up warning.
- By selecting Install, you may confirm the installation location.
- A pop-up message will offer to close any programs that are causing problems with the installation. Click Install and then Close Applications. At this stage, you may need to authorize the installation.
- After the installation procedure is completed, the Mac will restart, according to a message. Continue the installation process by clicking Continue.
- Click Restart after noticing the installation has been completed successfully.
How to use Canon EOS webcam utility Beta?
After downloading and installing Canon EOS webcam utility Beta, follow these steps to make its use:
- Connect the Canon camera to a computer through a USB connection. The port is normally hidden under a flap on the camera’s left side.
- Connect the Mac to the USB cord.
- If a Movie Mode is available on the camera, choose it.
- Select EOS Camera Utility Beta from the list of webcam sources in your video conferencing app’s settings menu.
How do I transfer photos or videos from my Canon camera to my Macbook?
After connecting your camera to MacBook using a USB cable, SD card, or wifi, follow one of these steps to transfer pictures or videos from your Canon camera to the MacBook:
- Drag files or folders to the Photos pane from the Finder.
- Drag and drop files or folders from the Finder to the Dock’s Photos icon.
- Select File > Import from the Photos menu. After you’ve chosen the photographs or folders you wish to import, click Review for Import. If you chose several photographs or videos, click Import [number] Selected or Import All after selecting the photos or videos you wish to import.
This part of How to connect canon camera to mac describes sharing data.
Why can’t I connect my Canon camera to my mac?
These might be the reasons why your camera is not connecting to your mac:
- Make sure your camera and computer are both connected with a USB or USB-C connection. Try inserting the card into another USB port on your computer.
- Check to see that your camera is switched on and in the proper mode for importing photographs. Look at the instructions that came with your camera.
- Examine the memory card in your camera for any damage. For additional information on this or other potential issues, see the documentation that comes with your camera.
Read Also: Can i use Nikon lenses on a canon camera?
Can I connect camera to mac with HDMI?
YES. After you’ve decided on a video adapter, you’ll need a cable to connect it to your TV. Most adapters support HDMI, however, most cameras only support mini HDMI. So you may either buy a micro HDMI to HDMI cable or an HDMI to micro HDMI converter if you already have an HDMI to HDMI cable.
How do I upload photos from my camera to my mac?
Choose File > Import from [camera name] in the Preview program on your Mac. Choose File > Import from Camera > [camera or device name] if you have more than one camera attached to your Mac. A window with thumbnail pictures of all of your camera’s photographs appears.
How do I enable my camera on my mac?
Choose Apple menu > System Preferences, then Security & Privacy, then Privacy on your Mac. Choose a camera. Upgrade to macOS Mojave or later if you don’t see Camera. To enable an app to utilize the camera, tick the box next to it.
Conclusion
“ How to connect canon camera to mac ” is no longer a tough question for you. As now you know canon Rebel, EOS, point and shoot, and PowerShot cameras can be connected to MacBook with wifi, USB, and a card reader. The process is not too complex either.
Featured image: Desola via unsplash.com
FAQs
How do I open Canon EOS utility on mac?
- On the left side of this page, choose your model.
- The “Drivers & Downloads” tab should be selected.
- Select the “Software” tab from the drop-down menu.
- Click the “Choose” button to select the “EOS Utility.”
- When the file description appears, click “I have read and agree to the conditions.”
Why is my Mac not detecting my camera?
Select Security & Privacy from the Apple menu > System Preferences. Then, on the sidebar, select Camera under the Privacy tab. Check the boxes next to the applications where you’d want to utilize your camera. Before an app may utilize your camera, you may be requested to close and reopen it.
How do I know if my mac camera is plugged in?
Image Capture is part of the standard Mac operating system.
- Connect your camera to your Mac computer in step one. Connect the smaller end of a tiny USB wire to the camera’s AV/OUT DIGITAL port.
- Upload your images. Click Image Capture in the Applications folder in the Finder.
