Manuals include Nikon D3200 shutter speed, aperture, fps, and ISO settings for photos under different lighting and other conditions. Under some conditions in photography, you might wonder how to change these settings on Nikon D3200. It is not possible in the Auto mode of the camera. It is upon you to choose a model that suits you better according to the conditions. Let’s dive in to have an easy and comprehensive knowledge that can help you choose a mode for certain conditions.
As Nikon D3200 is a DX-format sensor camera, the final results of photos or videos can be improved by changing the settings.
To change these settings, you must go into manual or related mode. To understand which one you should choose according to your conditions, also read the information in the guide.
How to change Nikon D3200 shutter speed and aperture?
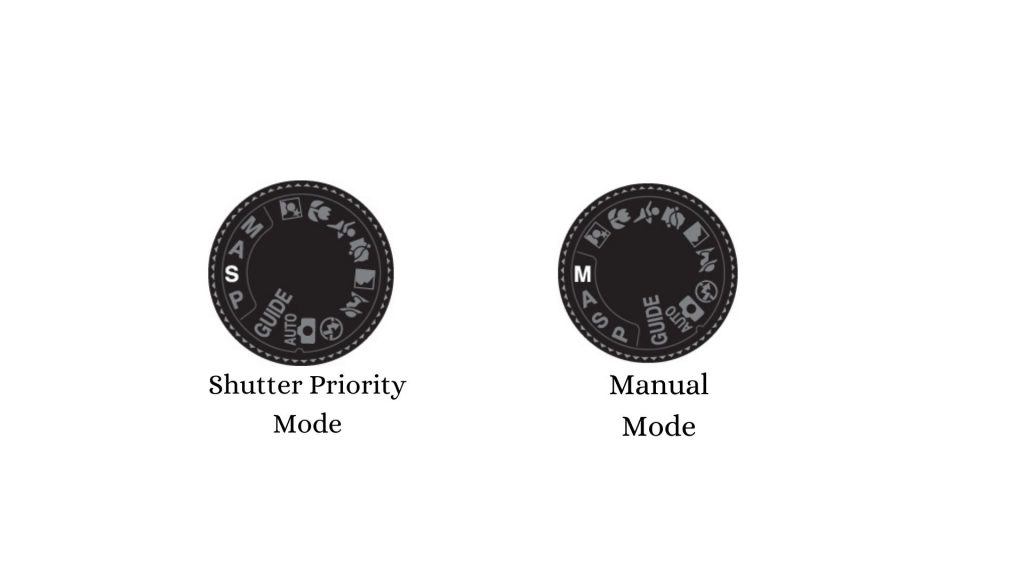
To control shutter speed, you must choose S(Shutter Priority Mode) or M(Manual Mode). Here is how you can manually adjust the shutter on Nikon D3200.
- Turn the camera ON.
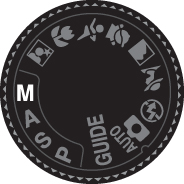
- Rotate the mode dial to “ S ”(shutter priority mode) or “ M ”(manual).
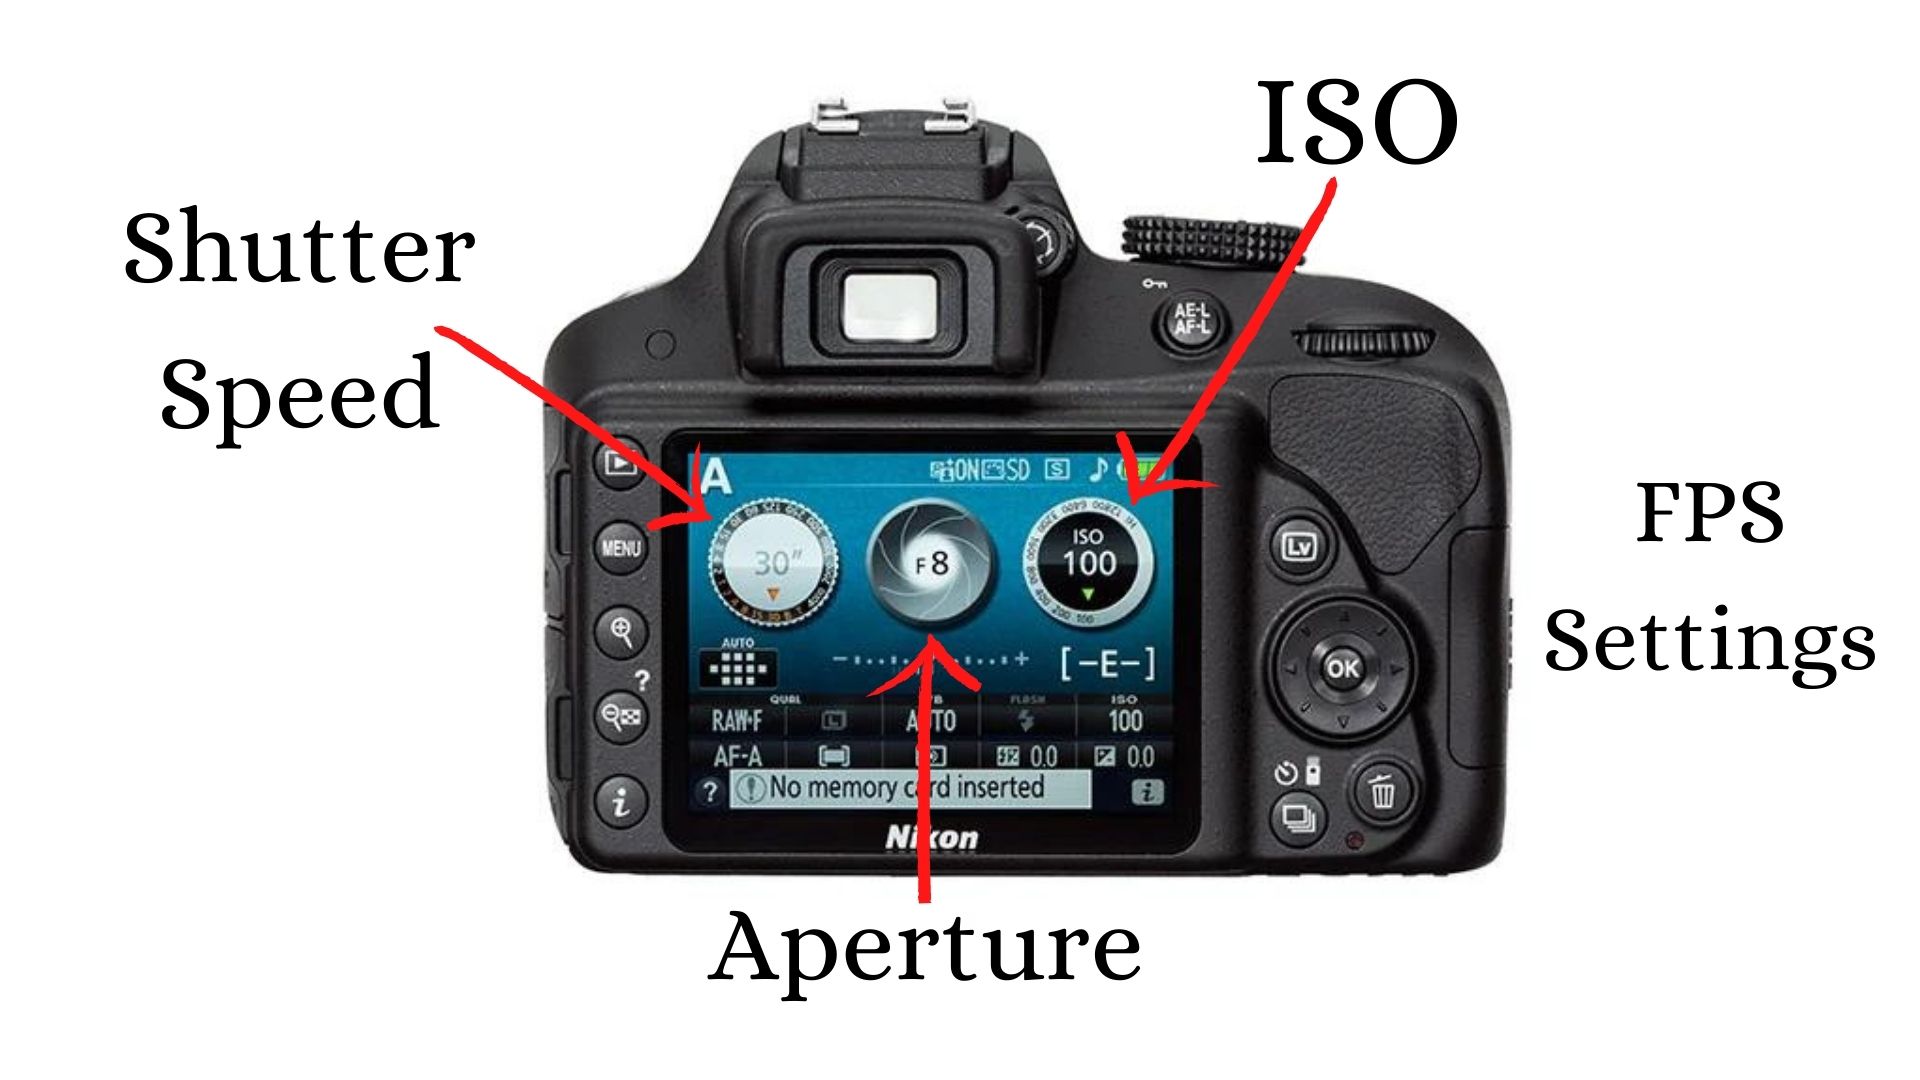
- 3 dials appear on the screen. The first one is for shutter, the second is for aperture, and the third is for ISO. You can change shutter speed in S and M modes.
- To change the shutter speed in manual or shutter priority mode, turn the command dial right for faster shutter speeds and left for slower shutter rates.
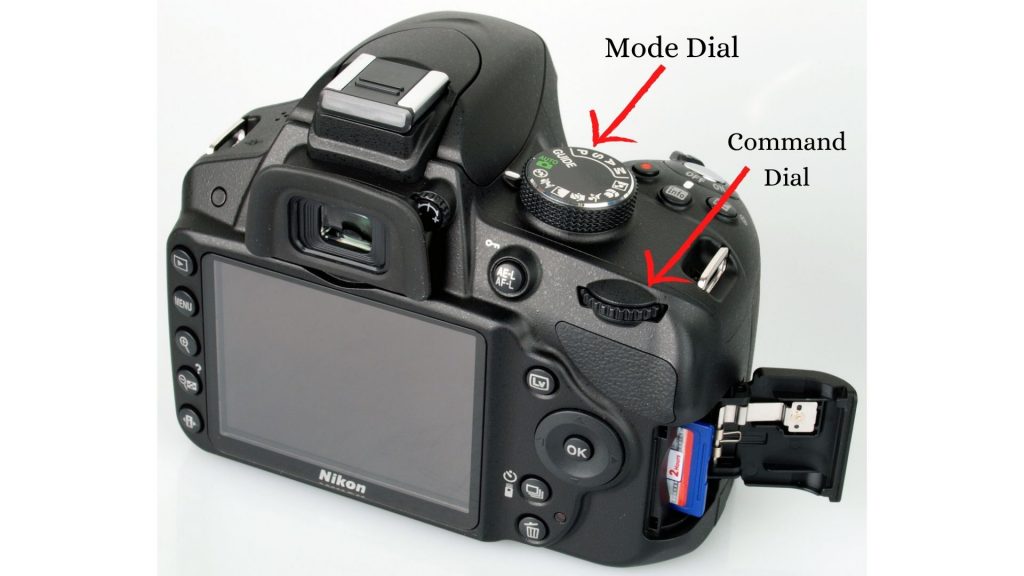
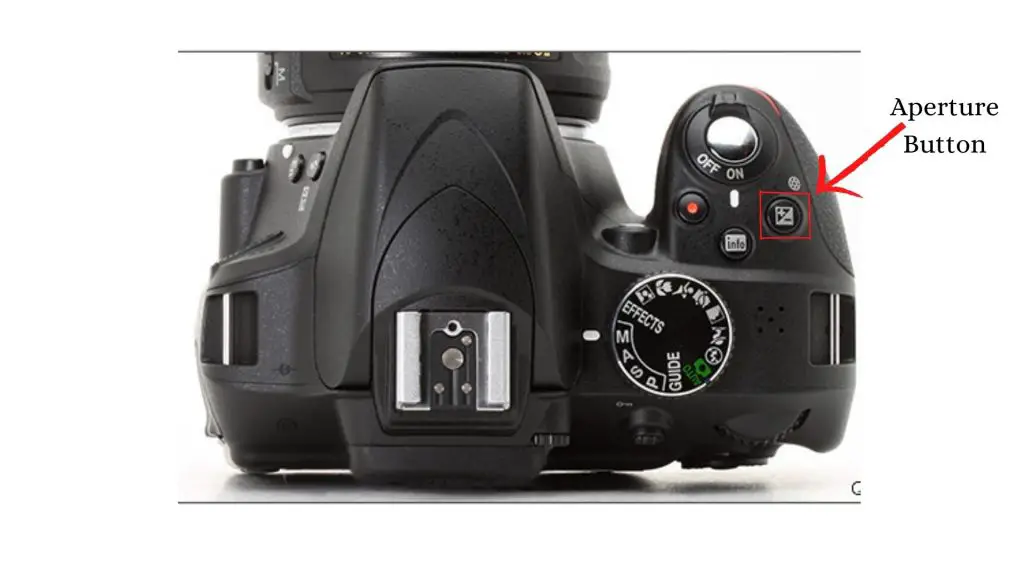
- To change aperture in manual mode, rotate the command dial (left for larger apertures/lower f-numbers, right for smaller apertures/higher f-numbers) and keep the Adjusting Aperture button pressed.
What is Shutter priority mode in a camera?
Shutter Priority mode, or S mode, is what we photographers call it. It is the mode that prioritizes or lays a strong emphasis on the shutter speed over all other camera settings, as the name implies.
Shutter Priority mode, like Program mode, allows us additional control over some areas of our photography. We’re talking about shutter speed in this scenario.
Read Also: Nikon D3200 sample images
The shutter speed you choose impacts how long your camera’s sensor is exposed to light. The longer it stays open, the longer your sensor has to collect light.
The shutter speed also impacts how sharp your photos are to a considerable extent. This is not the same as having a sharply focused image. The sharpness of an image is influenced by a number of factors, including camera shake and the movement of the subject.
Because a slower shutter speed means that light from your subject hits the sensor for a longer length of time, any movement you or your subject makes will appear as a blur in your images.
When to use Shutter Priority Mode?
- When you’re working with fast-moving subjects and wish to stop the activity.
- When you wish to use motion blur to accentuate movement in your subject.
- When you wish to gather light over a long period of time with a long exposure.
- When you want to make the water in a waterfall look silky.
As you can see, whether or not you employ Shutter Priority mode depends on the subject of the photo. It’s critical to be able to visualize the outcome of employing a specific shutter speed.
You need to keep in mind self-timer and time-lapse as well.
Read Also: Nikon camera Self-timer and time-lapse settings
The advantage of shooting with a digital camera is that you can see your photo on the LCD screen right away and get fast feedback. But what if your topic refuses to give you a second chance? When photographing sporting events, this is frequently the case. You can’t go back to the quarterback and ask him to throw that touchdown pass because your last photo was blurry due to a poor shutter speed. This is why it’s crucial to understand what those speeds mean in terms of stopping activity and delivering a blur-free photo.
What is Manual Mode in a camera?
Manual mode existed once upon a time, long before digital cameras and program modes. It wasn’t dubbed “manual mode” back then since there weren’t any other options—it was just photography. Many photographers began their careers with entirely manual cameras.
Let’s face it: there’s no better way to learn about the impacts of aperture and shutter speed on your photography than to make those adjustments yourself. With the evolution of camera technology, however, many new photographers no longer consider this mode.
That’s a shame because it’s not only a great way to learn the fundamentals of photography, but it’s also a useful tool to have in your toolbox.
The camera meter will give you a reading of the scene you’re photographing if your camera is set to Manual (M) mode. To acquire a perfect exposure, you must set both the f-stop (aperture) and the shutter speed.
If you require a faster shutter speed, change your f-stop in the opposite direction. Using any other mode, such as Shutter Priority or Aperture Priority, would only require you to think about one of these adjustments, however, Manual mode requires you to make all of them.
This can be difficult at first, but after a period, you’ll have a better knowledge of how each modification affects your exposure, which will help you use the other modes more effectively.
When to use the Manual Mode of a camera?
- Overriding the camera’s meter readings is required when shooting silhouetted subjects.
- When your light meter is fooled by your surroundings and you need to keep a specific exposure setting.
- When studying how each exposure aspect interacts with the others, there are a few things to keep in mind.
Read Also: Flash guide for Nikon Cameras
How to change Frame Rate or Frame Size on Nikon D3200?
This is how you can easily adjust the frame rate or frame size on a Nikon D3200. This is possible only when manually shooting video with Nikon D3200.
Procedure
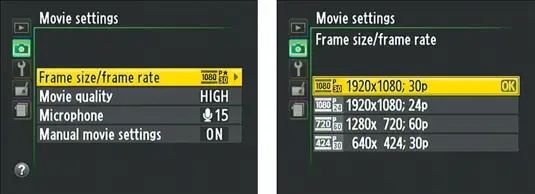
Press < MENU > and choose “ Shooting Menu “. Now select “ Movie Setting “ and then select “ frame size/frame rate”.
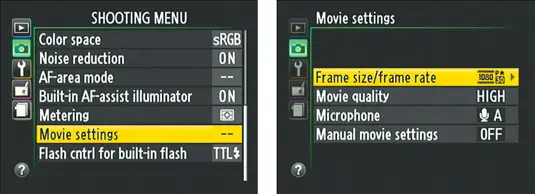
From the available option on screen choose one according to your requirement.
Understanding the Frame size
You have three frame sizes to pick from, all of which are measured in pixels:
1920 x 1080: This resolution produces a 16:9 aspect ratio Full HD (High-Definition) movie.
1280 x 720: Full HD, also in 16:9.
640 x 424: This setting produces a standard definition (not high-definition) movie. Frames are substantially smaller, with a 3:2 aspect ratio on average. (This lower resolution is appropriate for web videos).
Understanding the Frame Rates(FPS)
The smoothness of the playback is determined by the frame rate, which is measured in frames per second (fps). For the three frame sizes, assuming NTSC as the video standard, the following frame rates are available:
30 or 24 frames per second at 1920 x 1080
60 frames per second at 1280 × 720 pixels
30 frames per second at 640 × 424 pixels
On the camera panels, frame rate settings are stated as 30p, 24p, and 60p. The p stands for progressive, which refers to the method of recording video frames. Frames are formed in the progressive video by scanning one line of pixels at a time from top to bottom of the screen. Interlaced video is an earlier recording technique that scans and captures the even and odd lines of video individually before combining them to make a whole frame.
For non-techies, here are some recommendations to help you find the ideal frame rate:
24 frames per second (fps) is normal or standard for motion images, which gives your films a softer, more movie-like look.
30 frames per second (fps) is normal or standard for most network broadcast television, which delivers a clearer image.
60 frames per second are used to create Slow-motion films frequently. When you slow down the movie playback, the video is smoother since there are more frames per second. Just keep in mind that if you choose this option, you’ll lose resolution flexibility because it’s only accessible in the 1280 x 720 frame size.
Read Also: Nikon D3200 HDR Photography Hack
Nikon D3200 autofocus not working
Nikon D3200 camera body lacks an autofocus motor, so you must focus on the lens. Try to mount it properly or make it clean if dirty. You can also clean the viewfinder in this regard.
Nikon D3200 ISO settings
The Nikon D3200 boasts an ISO range of 100 to 6400, which is quite amazing. It can even be set to ISO Hi-1, which is the same as ISO 12800. The ISO is set in full stops, with 100, 200, 400, 800, 1600, 3200, 6400, and Hi-1 being the options. The sensitivity to light is doubled or halved every time the ISO is changed.
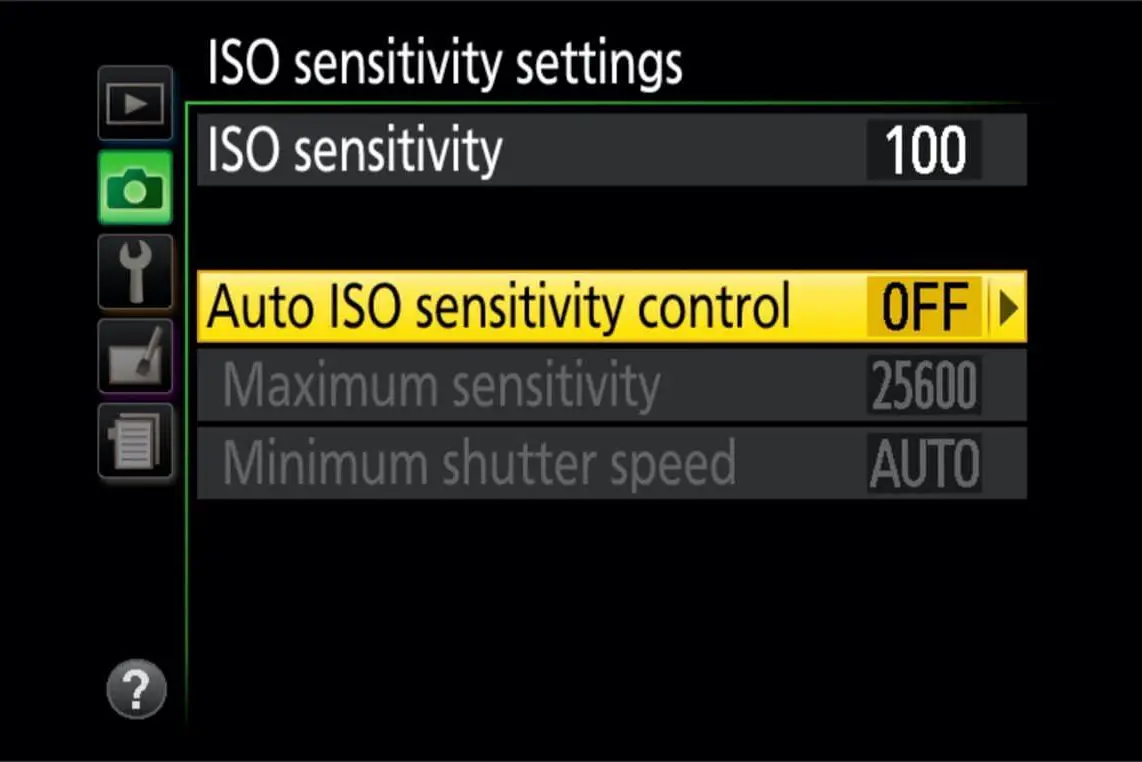
How to turn off Auto ISO Sensitivity Control on Nikon D3200?
The Nikon D3400 comes with Auto ISO turned on by default, but you may change it manually.
Shooting Menu (the camera icon) > ISO Sensitivity Settings > Auto ISO Sensitivity Control > Off
How to adjust ISO Sensitivity manually on Nikon D3200?
There are two methods of controlling ISO sensitivity on a Nikon D3200:
- By using i button
- By using screen controls
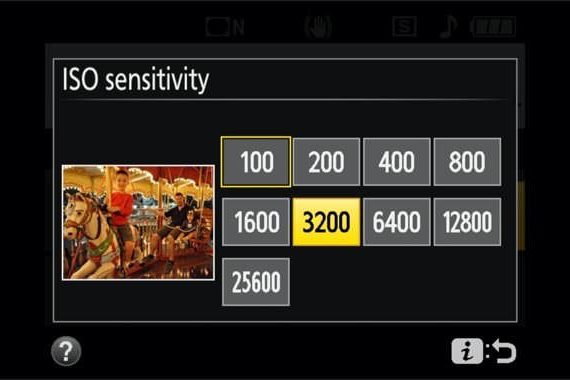
How to adjust Nikon D3200 ISO sensitivity manually by using the i button?
Press the < i > button on the camera.
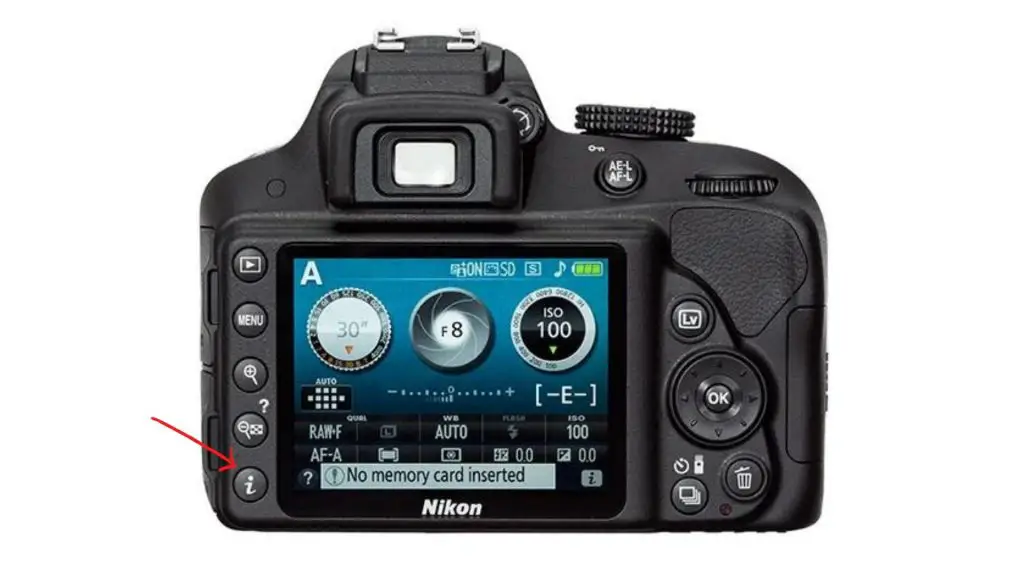
In the information display, highlight the current ISO sensitivity and press < OK >.

Select from the available options, and press < OK >
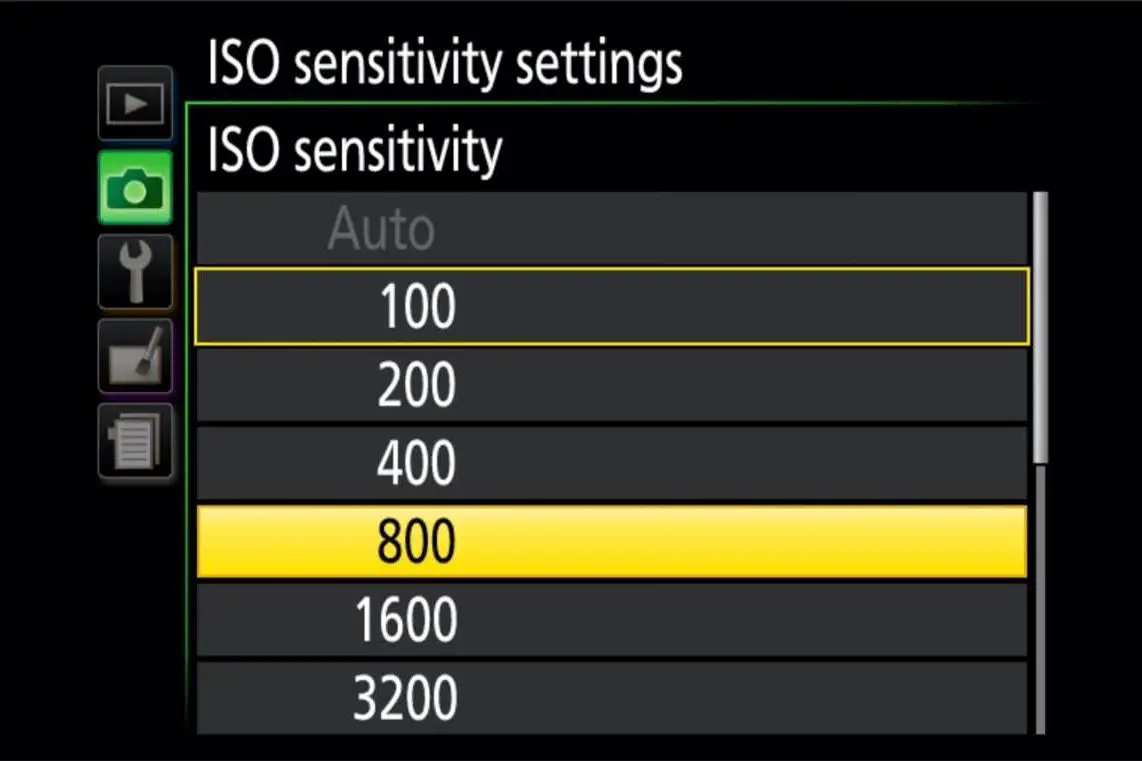
How to adjust Nikon D3200 ISO sensitivity manually by using screen control?
Shooting Menu (the camera icon) > ISO Sensitivity Settings > Auto ISO Sensitivity Control > ISO Sensitivity
Understanding the ISO
100: A sunny day
200: Hazy or outdoor shade
400: Indoor illumination in the evening or cloudy conditions outside
800: Late night, low-light conditions, or nighttime athletic stadiums
1600 and more: for long exposure shots
Read Also: Charge Nikon camera battery without charger
Important
What is the fastest shutter speed on the Nikon D3200?
The Nikon D3200’s fastest and slowest shutter speeds are as follows: In Shutter Priority mode, the fastest shutter speed is 1/4000 seconds, and the slowest shutter speed is 30′′ seconds. Learn how to use Aperture Priority Mode and change the aperture f-number in this video.
How do you use the exposure meter on a Nikon D3200?
On the Nikon D3200, you can replace the viewfinder’s exposure meter with a rangefinder, which employs a similar, meter-like display to indicate if the focus is set on the item in the selected focus point, as seen in the following figure.
Why are all my Nikon pictures blurry?
When the shutter speed is too slow, the camera detects movement and produces a fuzzy image. Make sure your shutter speed is faster than your focal length’s equivalent. To avoid camera shake, for example, if you’re zoomed out to 100mm, your shutter speed should be 1/100s or faster. You’ve got motion blur.
Conclusion
How to change the shutter speed on Nikon D3200 has been elaborated in an easy way. Just put the camera in shutter priority or manual mode and then increase or decrease the shutter speed by using the command dial. To adjust the aperture, put the camera in manual mode and adjust the aperture by using the command dial meanwhile pressing the aperture adjusting button.
To adjust ISO, use the I button and use screen controls to change the frame rate.
FAQs
Does the Nikon D3200 have auto ISO?
However, the D3200 features an Auto ISO mode that can be used in conjunction with MASP modes, often known as “manual” modes. Instead of using an absolute ISO setting, Auto ISO allows you to specify ISO indirectly in terms of limitations. For example, you may set the minimum shutter speed to 1/60s and the maximum ISO to 800.
How do you use manual focus effectively?
The basic methods for attaining the most precise manual focus are as follows:
- Turn the focus ring until the subject becomes more defined.
- Change to live view mode on your camera (where the LCD is your viewfinder).
- To zoom in on your subject, press the magnifier button and move the region of view with the arrows on your camera.
How do I take sharp pictures with manual focus?
Using the lens’s switch and the front ring to adjust, switch to manual focus on your DSLR. It’s simpler to get sharp photographs when you use Live View and zoom close on the subject. Pre-focus on an area where you think your topic will be if your subject is moving
